
S
Stephen Albert
Guest
A raised bed can help you grow better, tastier, and bigger vegetables. A raised bed filled with rich soil and organic amendments will warm faster in spring for an earlier planting start and an earlier harvest.
Raised beds can save you water and fertilizer and time. Your watering, feeding, and weeding efforts will be concentrated on the raised bed—commonly no more than 4 feet wide, and not on the surrounding unproductive ground.
Use raised bed when the soil is poor—heavy clay or too loose sandy soil. Raised beds of rich, organic soil will be quickly draining and full of plant nutrients.
Consider a raised bed if you live in an area where the soil is rocky or mostly sand or mostly clay. Adding organic matter to your soil is always a good idea and will always help make poor soil better. But sometimes a raised bed is the best solution.
You can choose the soil in your raised bed. You can purchase rich garden soil at the garden center or you can make your own by taking native soil from nearby and amending it with well-rotted manure and compost until it is rich and loamy.
The soil in a raised bed warms more quickly in spring—that’s good in short seasons and cool coastal regions. A raised bed also can be made tall enough to aid a back tired after years of bending. And the width of a raised bed will allow you to work your vegetable bed from different sides.
A bed width of no more than 4 feet (1.2 m) will allow easy access from each side. You don’t have to worry about soil compaction with a raised bed. All of your gardening is done from the edge. You can bring a chair, stool, or wheelchair to the edge of a raised bed. The more narrow the bed, the easier it is to reach the bed without having to lean on the soil.
A raised bed can be as little as 8 inches (20 cm) deep for shallow-rooted vegetables such as lettuce, spinach, and Asian greens. A raised bed 12 inches (30 cm) deep will work for root vegetables such as beets, carrots, and turnips and larger vegetables with deeper roots such as cabbage and Brussels sprouts. A bed 20 inches (50 cm) deep is best for fruiting vegetables such as tomatoes, eggplant, and beans. The roots of rooting vegetables reach deepest into the soil.
You can make a raised bed by simply placing a bottomless container or box in your garden and filling it with soil. You can also build a raised bed with lumber that has not been chemically treated, or you can place rocks in a square or rectangle and fill the area with good soil. You also simply mound the soil in your garden to create a raised planting area.
To edge a raised bed with wood, choose 2 by 6 or 2 by 8-inch lumber. Use two or three levels of boards held in place by stakes. Leave paths of 2-3 feet (60-90 cm) wide between the beds. Place newspaper covered by sand or shredded bark in the pathways to keep the weeds down.
With a raised bed you can concentrate your watering and plant care on the exact ground that will bring your food to the table. Raised beds cut down on soil compaction which can affect plant growth and productivity.
Not all vegetables are suited for raised bed gardening. Tall crops such as corn and sunchokes might be more easily managed in a level garden. But tall and vining crops can be grown in a raised bed where the trellis is placed on the north side of the bed allowing the tall crops to grow without shading the shorter crops.
1. A raised bed can as simple as a raised mound of soil. Choose the location for your planting bed and then from either side shovel surface soil to your intended growing bed. Add aged compost, planting mix, or store-bought top soil across the top of your raised mound and turn into the native soil. A raised mound should be at least 4 inches high; ten inches is better and will warm faster in spring as the sun shines on the side and top of the mound. A bed 4 feet wide will be easily accessible from either side; don’t make your raised wider than arm’s length so it is easily worked without stepping in to it. Make your raised bed just long enough to get from one side to the other.
2. Build a raised bed with timbers, planks, bricks, cement blocks, recycled concrete or wattles (landscape fabric filled with straw). Cedar or pine are the best choices for raised beds made from boards or planks; pine will last three to five years and cedar twice as long or more. Choose boards an inch or more thick and 8 inches or more wide and use posts or stakes to square off the bed at the ends. Be sure to select a flat site or rake it flat before you assemble the frame. If you live in gopher or burrowing pest country, line the bottom of the bed with hardware cloth. Once the bed is in place, fill it with aged compost and planting mix. Now you are ready to plant.
3. From one season to the next, add aged compost to your raised bed to keep it fresh and nutrient rich. You can add washed sand to beds in which you plan to plant carrots and root crops; a bit of sand will make the bed loose and friable. Raised beds can dry more quickly in hot weather—since the sides are exposed to the sun, so be sure to monitor the moisture in the soil by simply thrusting your finger into the soil every day or so to make sure it is moist, but not wet, a couple of inches below the surface.
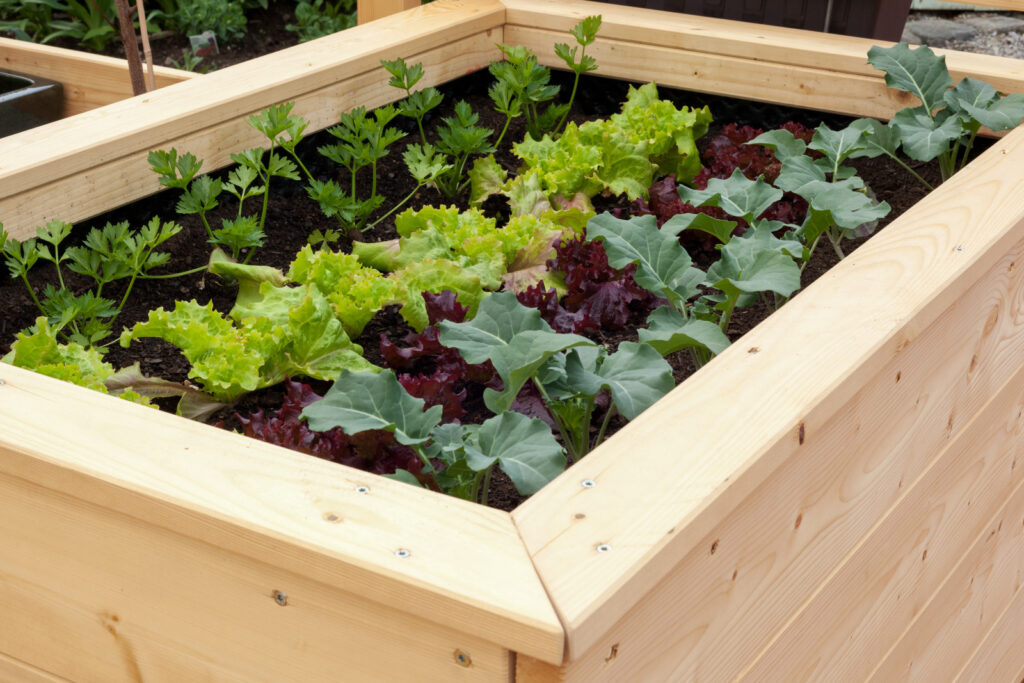
Raised bed with top cap for sitting
A shallow or mini-raised bed—just a yard square and 6 inches deep—will allow you to grow herbs and vegetables on a small patio, balcony, or rooftop. (Be sure to check with a structural engineer or contractor to make sure your roof or balcony is strong enough and waterproof.)
A raised bed is a bottomless square or rectangular frame made of planks. Many garden centers sell lightweight raised bed kits. You can also grow crops in a flexible bag planter.
Place landscape fabric under your raised bed to prevent potting mix from sitting directly on the roof or balcony surface. Many raised bed kits include feet and wire-mesh panels to set the bed up from the surface; place the landscape fabric below the mesh.
For balcony and roof-top beds use a lightweight potting mix; look for a soilless mix or lightweight potting mix. Add worm castings or well-rotted compost to the bed once or twice a year to keep the soil fertile.
Here are crops for raised beds 6 inches deep, 8 inches deep, and 12 inches deep:
A wood-framed raised bed for your garden is simply a wooden box—usually a square or a rectangle—that is open to the ground below and the sun and sky above. You can make a wood-framed raised bed from pine, spruce, cedar, redwood, or composite wood.
To make a wood-framed raised bed you will need enough wood to complete the box, screws or nails, a measuring tape, a saw, and a hammer or drill. A woodworker’s square and a pencil also will help you make accurate cuts and angles when putting your raised bed together.
The wood will be your greatest expense. A 4’x8’ raised bed using lumber 1” thick and 10” wide could cost you as little as $60 using new pine wood and as much as $200 using rot-resistant composite wood.
Wood that is more rot-resistant than another will be more expensive than wood that is less rot-resistant. Depending on the rot-resistance of the wood you choose, your raised bed should easily last from 3 to 20 years. You can save money by using recycled wood. But you should never use wood that has been treated with chemicals or paint—especially if your raised bed is being used to grow crops that you will eat.
The cost of the lumber will be determined by the thickness, width, and length of each piece. Make your raised bed from lumber that is either 1 inch or 2 inches thick; a piece of lumber that is 2 inches thick will withstand more wear than a piece of lumber that is 1 inch thick; it will also be more expensive. Standard widths of lumber are 2-, 4-, 6-, 8-, 10-, and 12 inches. Commonly raised beds are constructed from lumber that is between 6- and 12 inches wide. Standard lengths of lumber are 6, 8, 10, 12, 14, 16, 18, 20, 22, and 24 feet.
Take a plan that includes the length and width of the raised bed you want to build to the retailer and ask for lumber that will require you to make the fewest cuts to build the bed you want. The lumber yard may make each cut you need—usually for an extra fee.
You will also need screws or nails to put your raised bed together. Show your retailer your rough raised bed plan and ask for help purchasing galvanized screws or nails. Galvanized metal will be the most weather resistant.
A wood-framed raised bed can be any width and length that you want it to be. But a raised bed that is a width that allows you to easily reach the plants you are growing without stepping into the bed and that is not so long that it becomes a chore to walk around is best.
A very useable raised bed for a vegetable garden would be 2-, 3-, or 4 feet wide and 4-, 6-, 8-, 10-, or 12 feet long. You can have several raised beds of differing sizes in your garden.
If you buying new wood, choose a wood that is sustainably grown—that means wood that meets the needs of the present without compromising the ability of future generations to meet their own needs. Ask the lumber yard or retailer where the lumber they sell comes from and how it is grown.
Here are the kinds of lumber most commonly sold—from least expensive to most expensive:
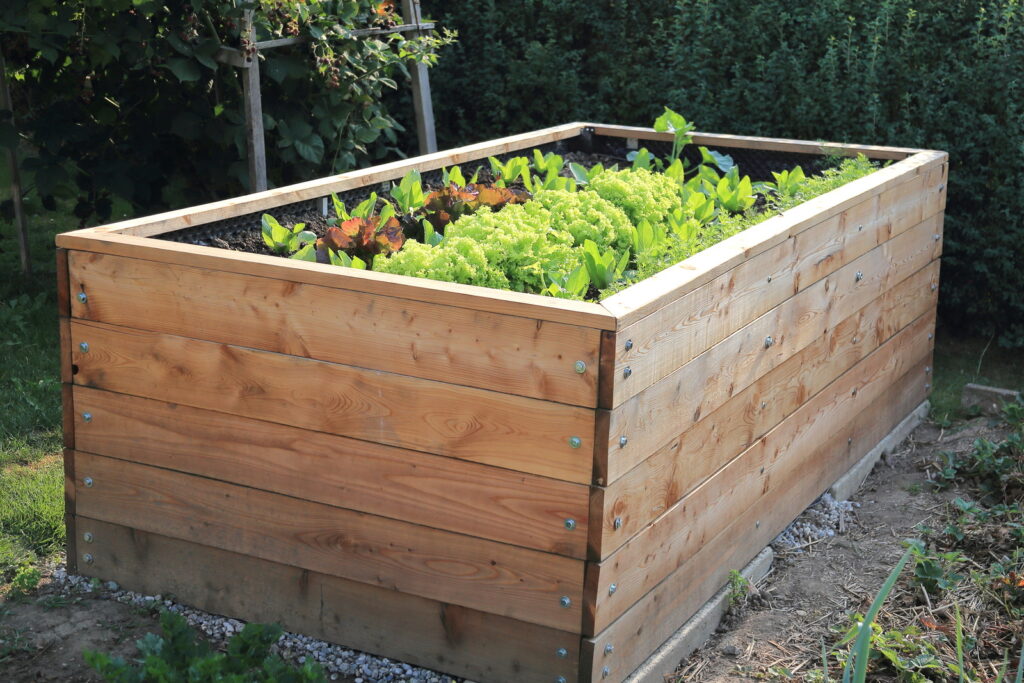
Tall raised beds mean less bending to tend these leafy crops.
Using cedar this bed should last more than 10 years.
For long-term strength, this bed uses 4”x4” corner posts sunk 6” into the ground; these posts are set at each of the four inside corners. For even greater stability, you can place posts halfway along the side walls. Posts help hold the bed in place and will reduce the outward pressure that soil will exert on the frame.
Supplies:
You will build each side of the bed separately, then fasten them together and put the bed into position.
Optional cap rail for sitting: Place a cap railing that you sit on or place tools on around the top of the bed. If you want to sit on the rail, you will need a piece 6 inches wide. Cut the lumber to fit around the top and screw it into place.
Optional hoops for covers: To protect crops with bird netting or season-extending row covers or plastic sheeting, bend two 8-foot pieces of ½-inch PVC pipe to form semi-circles, and slip their ends into the 1-inch pipes inside the bed. Drape the bird netting or row covers over them. Cut the 1-inch PVC pipe into four 12-inch-long pieces and the ½-inch PVC pipes into 8-foot-long pieces. To hold hoops for bird netting or row covers, attach four 12-inch pieces of 1-inch PVC pipe inside the bed: On the long sides, space pipes 4 feet apart, 2 feet from each end; screw on two tube straps to secure each pipe. Supplies:
Optional hardware cloth to exclude gophers: Hardware cloth lining to keep gophers and moles out: Once the bed is in place, rake the soil at the bottom level and tamp it smooth. Line the bottom of the bed with hardware cloth; you will need metal shears to trim the cloth and fit it around the bottom corners of the bed.
Soil: 32 cubic feet of soil mix; use a combination of topsoil, compost, and potting soil.
The post How to Make a Garden Raised Bed appeared first on Harvest to Table.
Continue reading...
Raised beds can save you water and fertilizer and time. Your watering, feeding, and weeding efforts will be concentrated on the raised bed—commonly no more than 4 feet wide, and not on the surrounding unproductive ground.
Use raised bed when the soil is poor—heavy clay or too loose sandy soil. Raised beds of rich, organic soil will be quickly draining and full of plant nutrients.
Consider a raised bed if you live in an area where the soil is rocky or mostly sand or mostly clay. Adding organic matter to your soil is always a good idea and will always help make poor soil better. But sometimes a raised bed is the best solution.
You can choose the soil in your raised bed. You can purchase rich garden soil at the garden center or you can make your own by taking native soil from nearby and amending it with well-rotted manure and compost until it is rich and loamy.
The soil in a raised bed warms more quickly in spring—that’s good in short seasons and cool coastal regions. A raised bed also can be made tall enough to aid a back tired after years of bending. And the width of a raised bed will allow you to work your vegetable bed from different sides.
A bed width of no more than 4 feet (1.2 m) will allow easy access from each side. You don’t have to worry about soil compaction with a raised bed. All of your gardening is done from the edge. You can bring a chair, stool, or wheelchair to the edge of a raised bed. The more narrow the bed, the easier it is to reach the bed without having to lean on the soil.
A raised bed can be as little as 8 inches (20 cm) deep for shallow-rooted vegetables such as lettuce, spinach, and Asian greens. A raised bed 12 inches (30 cm) deep will work for root vegetables such as beets, carrots, and turnips and larger vegetables with deeper roots such as cabbage and Brussels sprouts. A bed 20 inches (50 cm) deep is best for fruiting vegetables such as tomatoes, eggplant, and beans. The roots of rooting vegetables reach deepest into the soil.
You can make a raised bed by simply placing a bottomless container or box in your garden and filling it with soil. You can also build a raised bed with lumber that has not been chemically treated, or you can place rocks in a square or rectangle and fill the area with good soil. You also simply mound the soil in your garden to create a raised planting area.
To edge a raised bed with wood, choose 2 by 6 or 2 by 8-inch lumber. Use two or three levels of boards held in place by stakes. Leave paths of 2-3 feet (60-90 cm) wide between the beds. Place newspaper covered by sand or shredded bark in the pathways to keep the weeds down.
With a raised bed you can concentrate your watering and plant care on the exact ground that will bring your food to the table. Raised beds cut down on soil compaction which can affect plant growth and productivity.
Not all vegetables are suited for raised bed gardening. Tall crops such as corn and sunchokes might be more easily managed in a level garden. But tall and vining crops can be grown in a raised bed where the trellis is placed on the north side of the bed allowing the tall crops to grow without shading the shorter crops.
Kinds of raised beds
ere’s how to build a garden raised bed:
1. A raised bed can as simple as a raised mound of soil. Choose the location for your planting bed and then from either side shovel surface soil to your intended growing bed. Add aged compost, planting mix, or store-bought top soil across the top of your raised mound and turn into the native soil. A raised mound should be at least 4 inches high; ten inches is better and will warm faster in spring as the sun shines on the side and top of the mound. A bed 4 feet wide will be easily accessible from either side; don’t make your raised wider than arm’s length so it is easily worked without stepping in to it. Make your raised bed just long enough to get from one side to the other.
2. Build a raised bed with timbers, planks, bricks, cement blocks, recycled concrete or wattles (landscape fabric filled with straw). Cedar or pine are the best choices for raised beds made from boards or planks; pine will last three to five years and cedar twice as long or more. Choose boards an inch or more thick and 8 inches or more wide and use posts or stakes to square off the bed at the ends. Be sure to select a flat site or rake it flat before you assemble the frame. If you live in gopher or burrowing pest country, line the bottom of the bed with hardware cloth. Once the bed is in place, fill it with aged compost and planting mix. Now you are ready to plant.
3. From one season to the next, add aged compost to your raised bed to keep it fresh and nutrient rich. You can add washed sand to beds in which you plan to plant carrots and root crops; a bit of sand will make the bed loose and friable. Raised beds can dry more quickly in hot weather—since the sides are exposed to the sun, so be sure to monitor the moisture in the soil by simply thrusting your finger into the soil every day or so to make sure it is moist, but not wet, a couple of inches below the surface.
Raised bed with top cap for sitting
Crops to grow in a raised bed
A shallow or mini-raised bed—just a yard square and 6 inches deep—will allow you to grow herbs and vegetables on a small patio, balcony, or rooftop. (Be sure to check with a structural engineer or contractor to make sure your roof or balcony is strong enough and waterproof.)
A raised bed is a bottomless square or rectangular frame made of planks. Many garden centers sell lightweight raised bed kits. You can also grow crops in a flexible bag planter.
Place landscape fabric under your raised bed to prevent potting mix from sitting directly on the roof or balcony surface. Many raised bed kits include feet and wire-mesh panels to set the bed up from the surface; place the landscape fabric below the mesh.
For balcony and roof-top beds use a lightweight potting mix; look for a soilless mix or lightweight potting mix. Add worm castings or well-rotted compost to the bed once or twice a year to keep the soil fertile.
Here are crops for raised beds 6 inches deep, 8 inches deep, and 12 inches deep:
Crops to grow in a 6-inch deep bed:
- Asian greens—mizuna, mibuna, tatsoi
- Beans–bush beans, climbing pole beans, and runner beans
- Carrots–round-rooted
- Garlic
- Herbs–basil, chives, cilantro, dill, oregano, mint, thyme
- Lettuce and other greens
- Onions, shallots
- Peas
- Radishes
- Spinach
- Strawberries
- Tomatoes—bush, determinate, miniature, tumbling
- Zucchini
Crops to grow in an 8-inch deep bed:
- Cabbage
- Chard
- Cucumber
- Eggplant
- Fava beans
- Florence fennel
- Herbs—rosemary, sage, tarragon, parsley
- Kale
- Leeks
- Melons
- Parsnips
- Peppers—bell peppers and chiles
- Pumpkins
- Squash
- Tomatoes—bush and vining
- Turnips
Crops to grow in a 12-inch deep bed:
- Beets
- Blueberries
- Carrots
- Currants—red, white, and black
- Corn
- Potatoes
- Raspberries
- Rhubarb
How to make a wood-framed raised bed
A wood-framed raised bed for your garden is simply a wooden box—usually a square or a rectangle—that is open to the ground below and the sun and sky above. You can make a wood-framed raised bed from pine, spruce, cedar, redwood, or composite wood.
To make a wood-framed raised bed you will need enough wood to complete the box, screws or nails, a measuring tape, a saw, and a hammer or drill. A woodworker’s square and a pencil also will help you make accurate cuts and angles when putting your raised bed together.
The wood will be your greatest expense. A 4’x8’ raised bed using lumber 1” thick and 10” wide could cost you as little as $60 using new pine wood and as much as $200 using rot-resistant composite wood.
Wood that is more rot-resistant than another will be more expensive than wood that is less rot-resistant. Depending on the rot-resistance of the wood you choose, your raised bed should easily last from 3 to 20 years. You can save money by using recycled wood. But you should never use wood that has been treated with chemicals or paint—especially if your raised bed is being used to grow crops that you will eat.
Lumber for a raised bed
The cost of the lumber will be determined by the thickness, width, and length of each piece. Make your raised bed from lumber that is either 1 inch or 2 inches thick; a piece of lumber that is 2 inches thick will withstand more wear than a piece of lumber that is 1 inch thick; it will also be more expensive. Standard widths of lumber are 2-, 4-, 6-, 8-, 10-, and 12 inches. Commonly raised beds are constructed from lumber that is between 6- and 12 inches wide. Standard lengths of lumber are 6, 8, 10, 12, 14, 16, 18, 20, 22, and 24 feet.
Take a plan that includes the length and width of the raised bed you want to build to the retailer and ask for lumber that will require you to make the fewest cuts to build the bed you want. The lumber yard may make each cut you need—usually for an extra fee.
You will also need screws or nails to put your raised bed together. Show your retailer your rough raised bed plan and ask for help purchasing galvanized screws or nails. Galvanized metal will be the most weather resistant.
Raised bed size
A wood-framed raised bed can be any width and length that you want it to be. But a raised bed that is a width that allows you to easily reach the plants you are growing without stepping into the bed and that is not so long that it becomes a chore to walk around is best.
A very useable raised bed for a vegetable garden would be 2-, 3-, or 4 feet wide and 4-, 6-, 8-, 10-, or 12 feet long. You can have several raised beds of differing sizes in your garden.
Wood for raised bed
If you buying new wood, choose a wood that is sustainably grown—that means wood that meets the needs of the present without compromising the ability of future generations to meet their own needs. Ask the lumber yard or retailer where the lumber they sell comes from and how it is grown.
Here are the kinds of lumber most commonly sold—from least expensive to most expensive:
- Pine is the most affordable and will last between 3 and 7 years. Price: $8 per 2”x10”x8’ piece
- Spruce is a more durable type of pine. Price: $9 per 2”x10”x8’
- Cedar is naturally rot- and insect-resistant and long-lasting. Price: $4 per 1”x4”x6’ piece; $9 per 1”x6”x10’
- Redwood is naturally rot- and insect-resistant, but expensive. Price: $6 per foot, usually just 1” thick
- Composite wood is made from recycled plastic and wood fibers and is very long-lasting. Price: $16 per 4 feet.
Tall raised beds mean less bending to tend these leafy crops.
Make a 4’x 8’ raised bed step-by-step
Using cedar this bed should last more than 10 years.
For long-term strength, this bed uses 4”x4” corner posts sunk 6” into the ground; these posts are set at each of the four inside corners. For even greater stability, you can place posts halfway along the side walls. Posts help hold the bed in place and will reduce the outward pressure that soil will exert on the frame.
Supplies:
- One 6-foot-long 4-by-4 ($20)
- Four 12-foot-long 2-by-6s ($100)
- 32 3½-inch #14 wood screws ($20)
You will build each side of the bed separately, then fasten them together and put the bed into position.
- With a hand, table, or power saw, make cuts on each 12’ piece at 4’. You now have four 8’ and four 4’ planks. Also, cut the 4×4” into four 16-inch-tall corner posts.
- Build the bed upside down. Assemble pieces on a hard, flat surface. Set one 4-foot 2-by-6 on its thin edge on the pavement, and place a 16-inch corner post at one end. Secure the post with two 3½-inch galvanized screws. Repeat at the other end of the board. Repeat with one other short board. (Instead of 4”x4” corner posts, you can attach lengths of lumber with metal angle brackets or 2”x4” pieces of lumber.)
- Join short sides with an 8-foot board and secure with two or three screws. (You will need at least 32 3½-inch #14 wood screws You may want to drill pilot or starter holes for the screws in advance.) Add another long side. You know have your frame.
- Add the second layer of 2-by-6s.
- Flip the bed right side up; you will need the help of a friend. This is a heavy and heavy-duty frame.
- Move the frame to its permanent location where the soil has been leveled in advance; use a steel rake to even out the ground where you are placing the frame.
- Mark with a trowel the position for each corner post. Move the bed aside; dig a 5- to 6-inch-deep hole for each post. Move the bed back into place, setting the corner posts in the holes; fill soil in around the posts.
- Use a level, make sure your frame is level in all directions; if the bed is not level, water will run into one part of the bed and sit in another. If one side of the frame is high, remove soil beneath that side until the frame is level.
Optional cap rail for sitting: Place a cap railing that you sit on or place tools on around the top of the bed. If you want to sit on the rail, you will need a piece 6 inches wide. Cut the lumber to fit around the top and screw it into place.
Optional hoops for covers: To protect crops with bird netting or season-extending row covers or plastic sheeting, bend two 8-foot pieces of ½-inch PVC pipe to form semi-circles, and slip their ends into the 1-inch pipes inside the bed. Drape the bird netting or row covers over them. Cut the 1-inch PVC pipe into four 12-inch-long pieces and the ½-inch PVC pipes into 8-foot-long pieces. To hold hoops for bird netting or row covers, attach four 12-inch pieces of 1-inch PVC pipe inside the bed: On the long sides, space pipes 4 feet apart, 2 feet from each end; screw on two tube straps to secure each pipe. Supplies:
- One 10-foot-long 1-inch PVC pipe
- Four 8-foot-long ½-inch PVC pipes
- Eight 1-inch galvanized tube straps–semicircular brackets
- 16 ½-inch #8 wood screws
Optional hardware cloth to exclude gophers: Hardware cloth lining to keep gophers and moles out: Once the bed is in place, rake the soil at the bottom level and tamp it smooth. Line the bottom of the bed with hardware cloth; you will need metal shears to trim the cloth and fit it around the bottom corners of the bed.
- Supplies: One 4-by-10-foot roll of ¼-inch-mesh hardware cloth
Soil: 32 cubic feet of soil mix; use a combination of topsoil, compost, and potting soil.
The post How to Make a Garden Raised Bed appeared first on Harvest to Table.
Continue reading...